

Cengage
How to Integrate With Canvas
Creating a Cengage Mindtap Account
Navigating Cengage
Logging In
Adding a Textbook or Product to Your Library
Adding or Changing Instructors
Creating a Cengage Mindtap Course
Single-Section Courses
Multisection Courses
Cengage
Cengage is a textbook publisher and digital learning platform. With Cengage Mindtap you can utilize interactive ebooks that allow you to share highlighted sections, create assignments, and help students stay on track. Instructors can also assign readings, embed multimedia, and more.
Suggested Uses
- Incorporate textbooks published by Cengage into your course (Note: Textbooks come at additional cost for students)
- Improve student interaction with your assigned textbook(s)
How to Integrate With Canvas
These steps assume that you have already created a Canvas course space. If you have not, create a course space first.
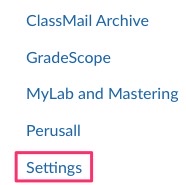
- Open your Canvas course space and click on Settings.
- Click on Navigation near the top.

- There are two lists here. Drag Cengage from the lower list to the upper list.
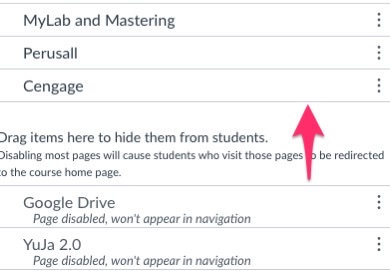
- Click Save at the bottom of this screen.

- Cengage should now appear as a menu item on the left-hand side of your Canvas course space.
Creating a Cengage Mindtap Account
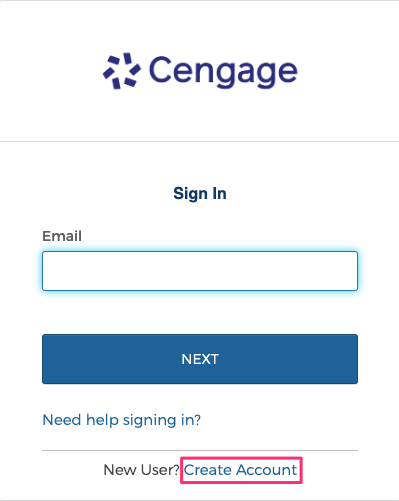
- Navigate to the Cengage Login page.
- Click Create Account.
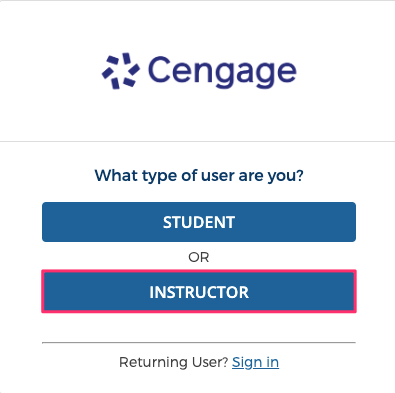
- Once the site redirects you, select Instructor.
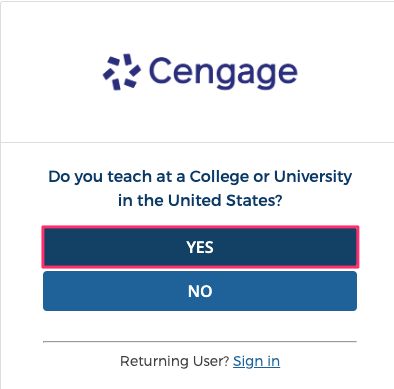
- When asked if you teach at a US higher education institution, click Yes.
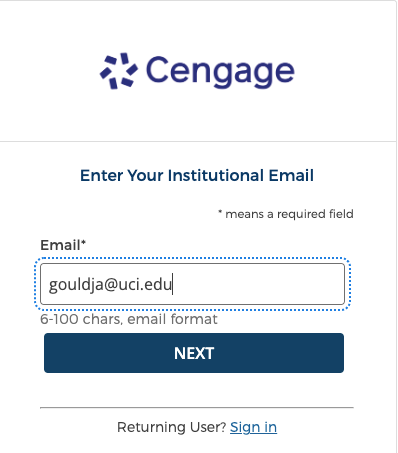
- Enter your institutional email address and click Next. Use the same email address you use to sign in to your LMS.
- Enter the requested information and select your institution.
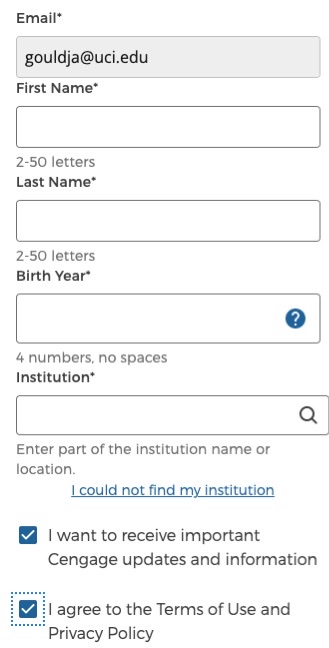
- Read and accept the Terms of Use and Privacy Policy.
- Click Verify my Identity.
Note: If you are not instantly verified, SheerID will email you for more information. Open your email from SheerID and click Click here to provide additional information. Acceptable documents include a link to a faculty list on your institution’s website, a copy of your instructor ID card, or a recent pay stub.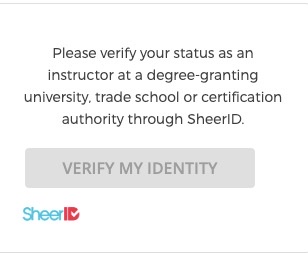
- Cengage will send you an activation email. Open the email and click Activate Cengage Account.
Note: You cannot access instructor-only features if your identity hasn’t been verified.
Navigating Cengage
Logging In
- Navigate to the Cengage Login page.
- Enter your email address and click Next.
- Enter your password and click Sign In.
- Select your course.
Adding A Textbook or Product to Your Library
- Enter a title, author, ISBN, or keyword in the search bar.
- Optional: Sort and filter your search results.
- Click a title.
- Click + My Library.
Adding or Changing Instructors
To Add an Instructor:
- Click Add Instructor.
- Enter the Instructor’s email address.
- Click the checkmark.

To Set a Primary Instructor:
- Click Make Primary.
To Remove an Instructor:
- Click the trash icon.

Note: You cannot remove the primary instructor.
Creating a Cengage Mindtap Course
Single-Section Courses
- Sign in to the Instructor Center.
- If you have not already done so, add the textbook or product you want to use to your library.
- Set instructors.
- Click Finish.
Multisection Courses
- Sign in to the Instructor Center.
- If you have not already done so, add the textbook or product you want to use to your library.
- Set instructors.
- Click Finish.
- Click Set Up MindTap to configure your new course.
- Locate your course and click
 .
.