

Website
Support Contact
Help Documentation
Macmillan
How to integrate With Canvas
Creating a Single Course
Creating a Multi-Section Course
Managing Your Sections
Macmillan
Macmillan Learning is a textbook publishing and digital learning platform. It includes additional tools such as LaunchPad and Sapling.
Suggested Uses
- Incorporate textbooks published by Macmillan into your course.
- Make use of interactive ebooks, quizzing, and additional teaching resources.
How to Integrate With Canvas
These steps assume that you have already created a Canvas course space. If you have not, create a course space first.
- Open your Canvas course space and click on “Settings”.
- Click on “Navigation” near the top.
- There are two lists here. Drag “Macmillan Learning” from the lower list to the upper list.
- Click “Save” at the bottom of this screen.
- Macmillan Learning should now appear as a menu item on the left-hand side of your Canvas course space.
Creating a Single Course
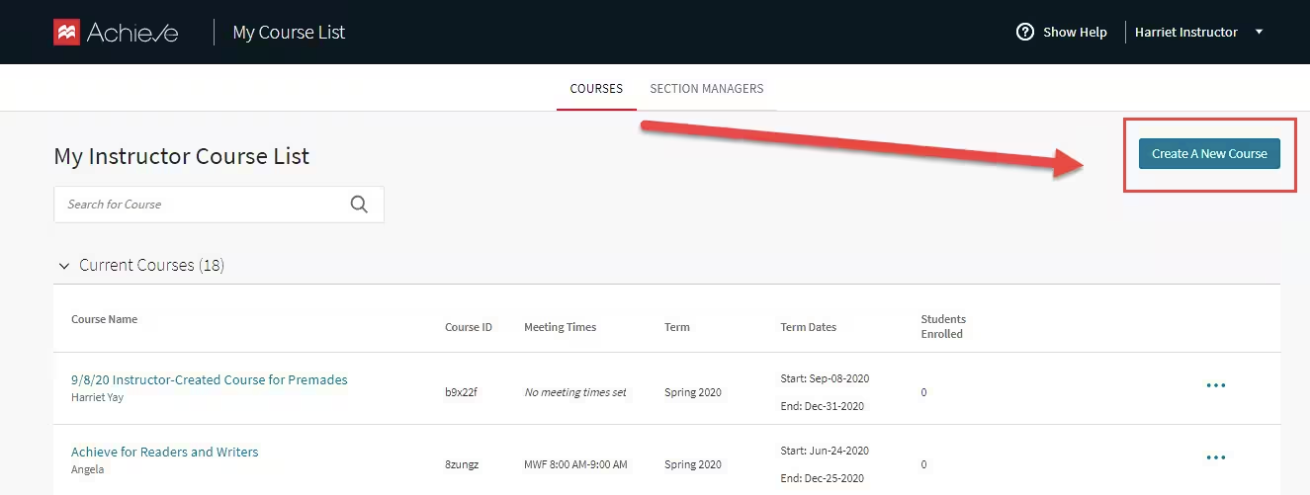
- Go to Achieve My Course List.
- Click the Create New Course icon on your My Course List Dashboard.
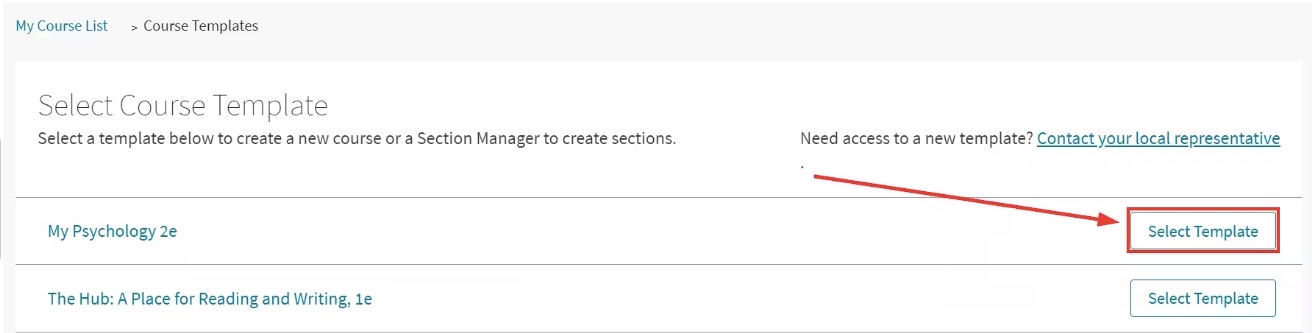
- You will be shown a list of all the course templates. To select a course click Select Template.
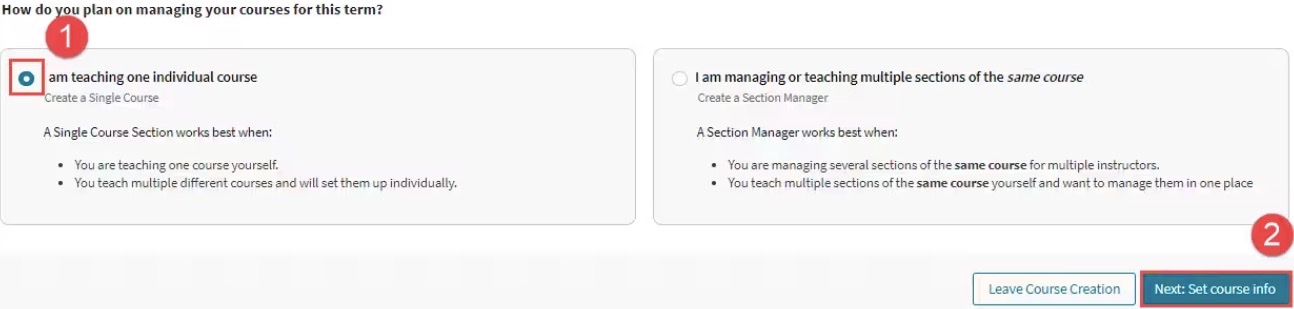
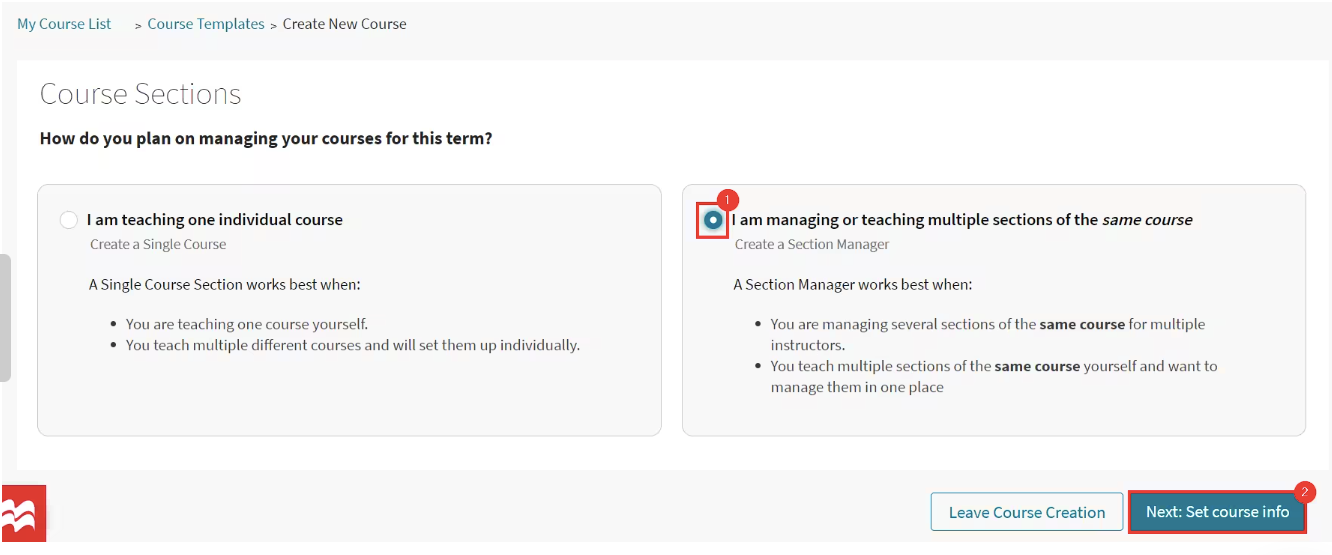
- Select Create a single course.
- Click Next: Set Course Info.
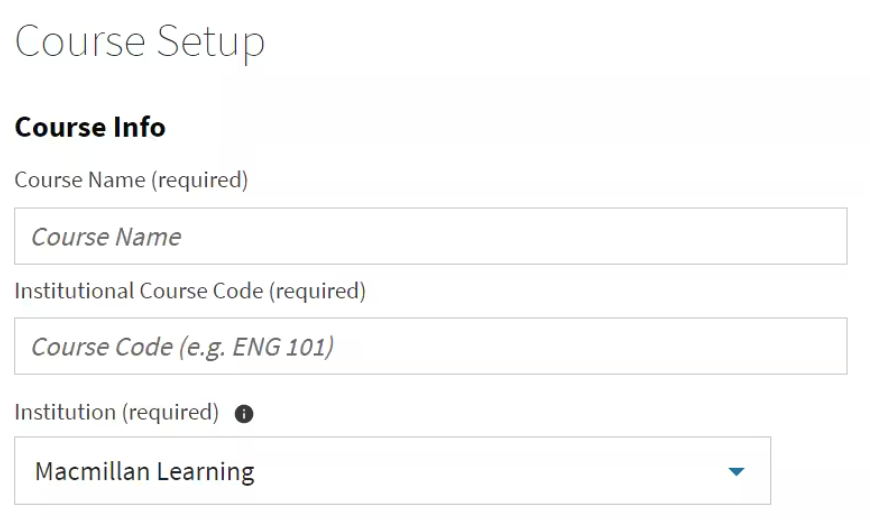
- Under Course Info, enter your course name, course code, and institution.
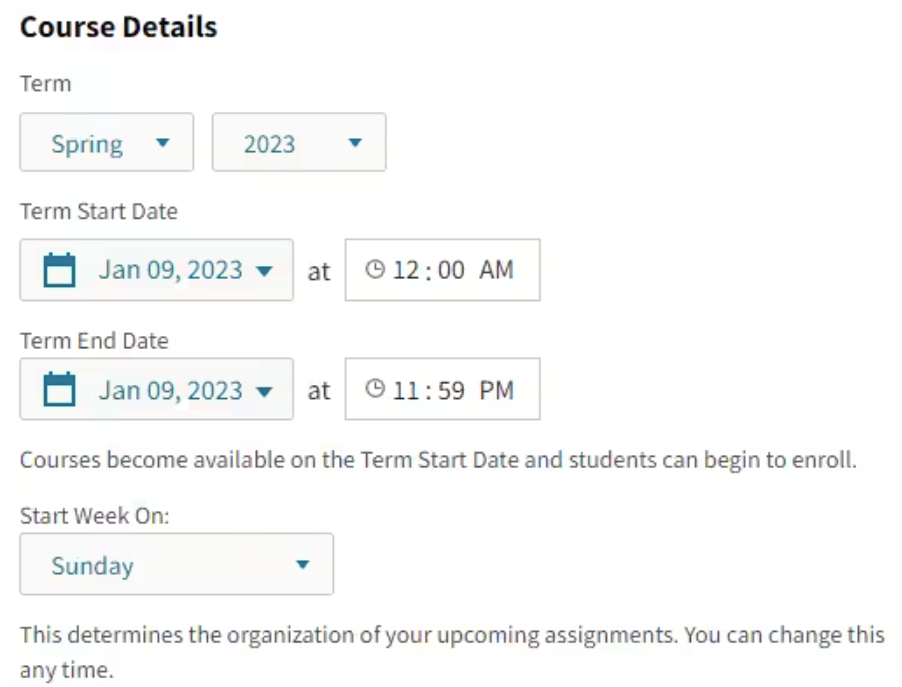
- Under Course Details, Enter the Term, Term Start Date, and Term End Date. Students will only be allowed access to your course during the time period between the start and end dates.
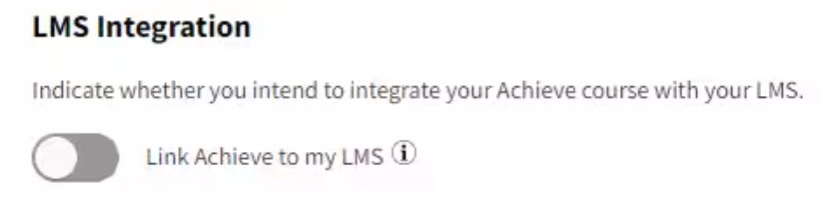
- If you plan to integrate your Achieve course with an LMS, select Link Achieve to my LMS. This will trigger prompts within your Achieve course to assist you with the integration process.
- Click Next: Create Course at the bottom right of your screen. You’ll receive a confirmation message that your course creation was successful and immediately be redirected to your new course.
Creating a Multi-Section Course
- Go to Achieve My Course List.
- Click the Create New Course icon on your My Course List Dashboard.
- You will be shown a list of all the course templates. To select a course click Select Template.
- Select I am managing or teaching multiple sections of the same course.
- Click Next: Set Course Info.
- Under Course Info, enter your course name, course code, and institution.
- Under Course Details, Enter the Term, Term Start Date, and Term End Date. Students will only be allowed access to your course during the time period between the start and end dates.
- If you plan to integrate your Achieve course with an LMS, select Link Achieve to my LMS. This will trigger prompts within your Achieve course to assist you with the integration process.
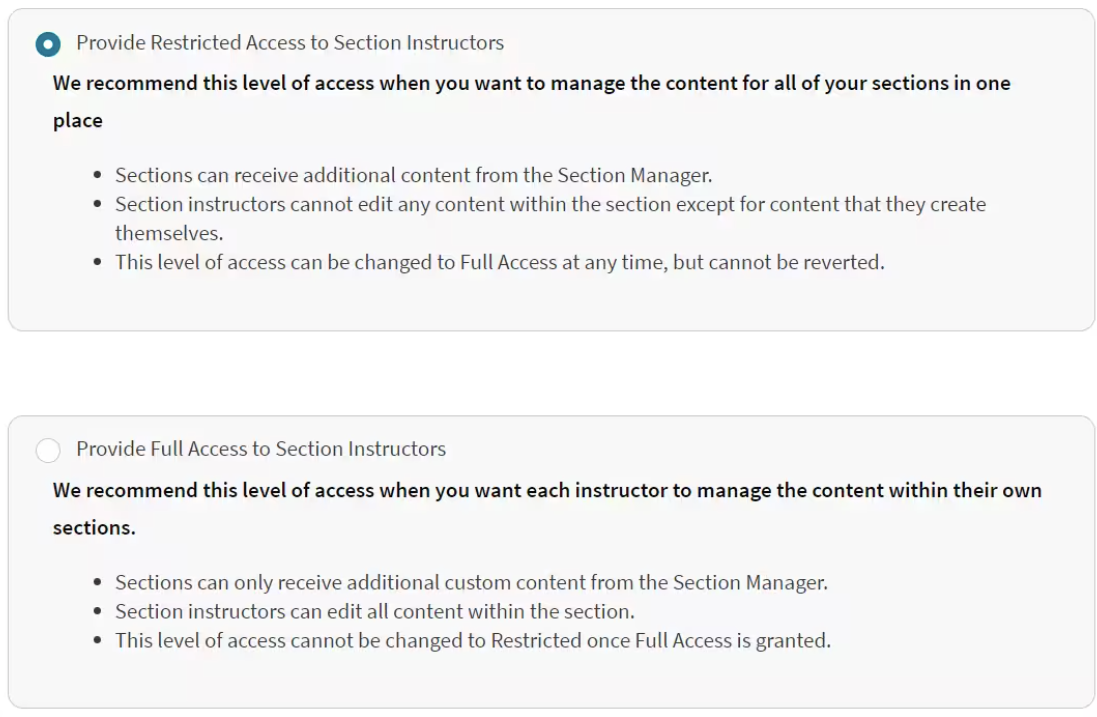
- Determine your course permissions. The course permission options are Restricted Access or Full Access sections. Restricted Access sections will receive content updates from the Section Manager while Full Access sections will not.
- When you’re done entering your course details, click Next: Create Section Manager at the bottom right of your screen. You’ll receive a confirmation message that your course creation was successful.
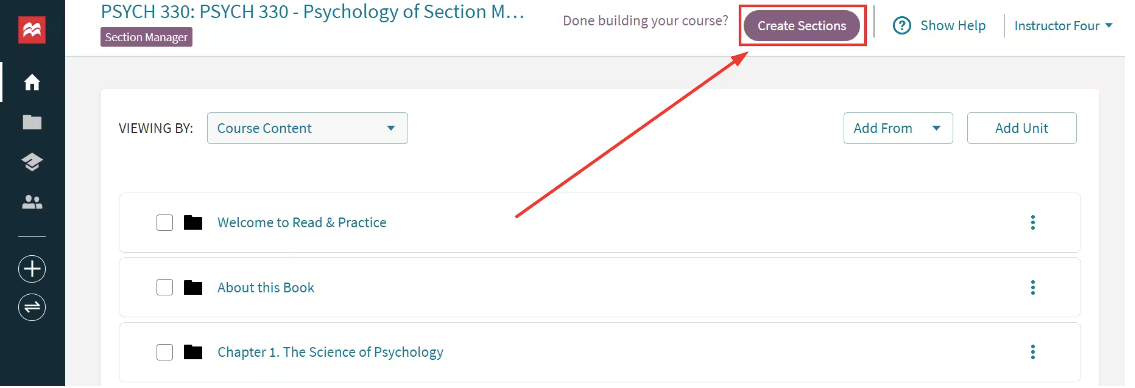
Managing Your Sections
Creating Sections
- Click Create Sections from the header inside the Section Manager.
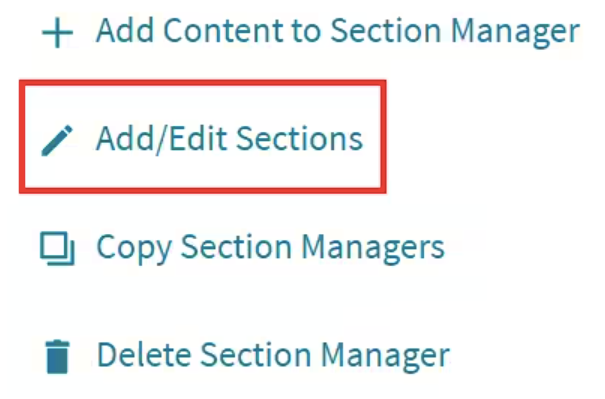
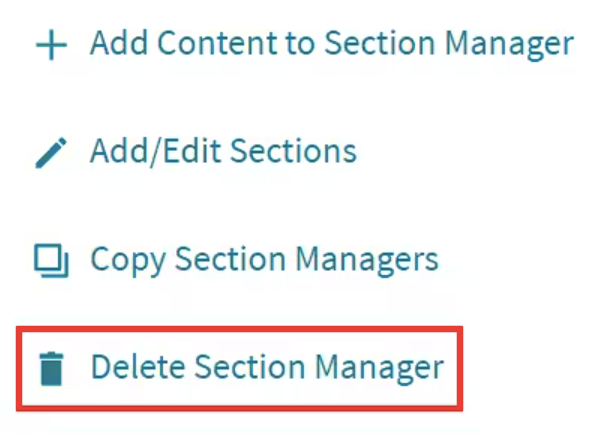
- click on the three-dot menu next to the Section Manager and click Add/Edit Sections.
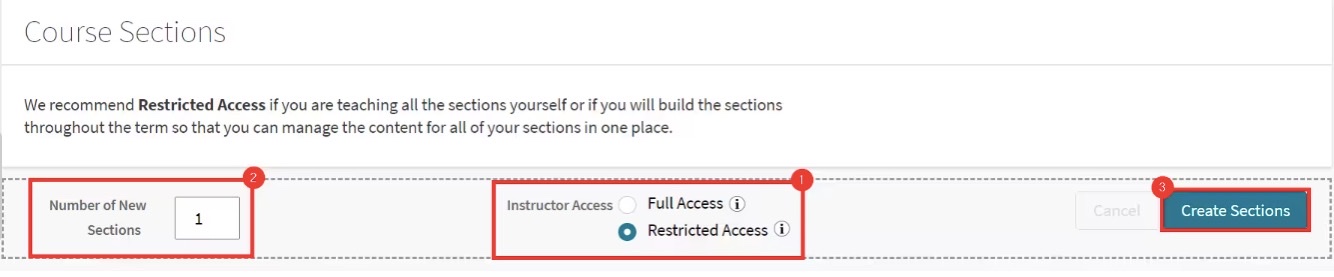
- Select an Instructor Access option if needed, type in a number of New Sections, then click Create Sections.
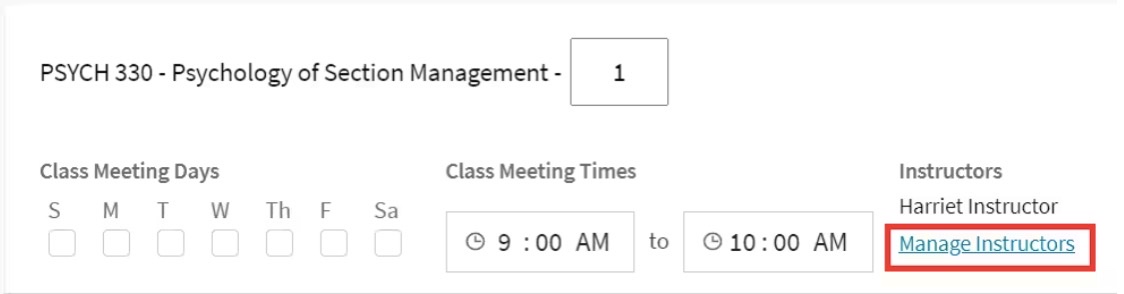
- Enter section information.

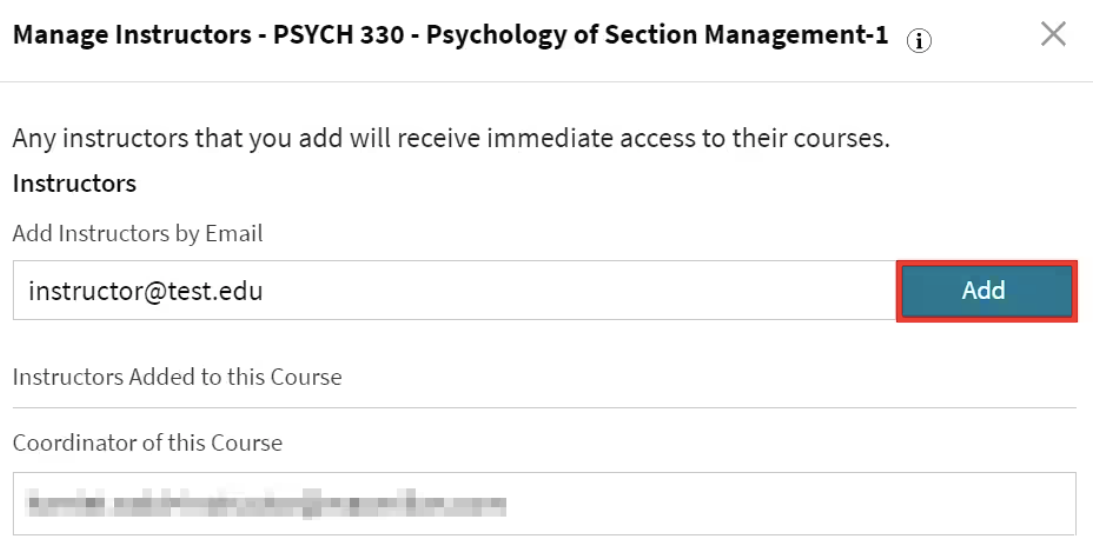
- Click Manage Instructors to add instructors to a section.
- Type their e-mail address and click Add.
Add/Edit Sections
Click the Add/Edit Sections button on the View Sections page.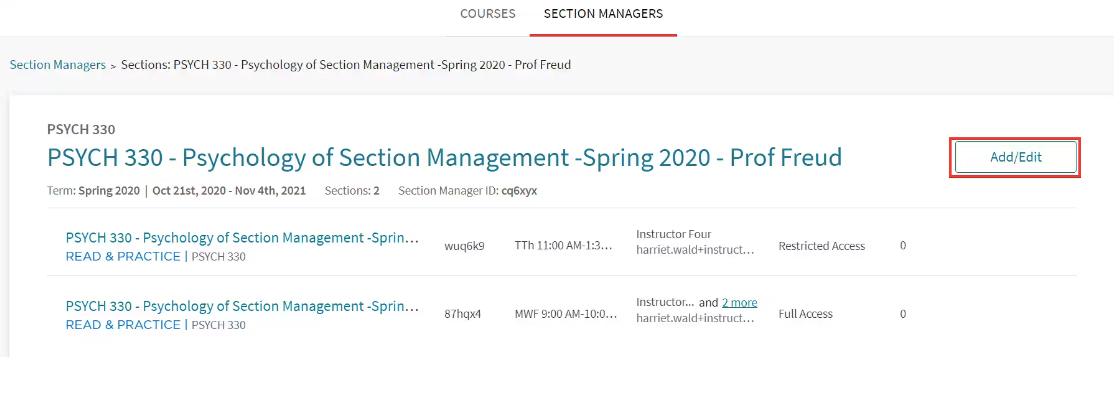
Copy Section Managers
To make a copy of a Section Manager, go to the Section Managers tab of your My Course List and click on the three-dot menu to the right of the Section Manager you want to copy.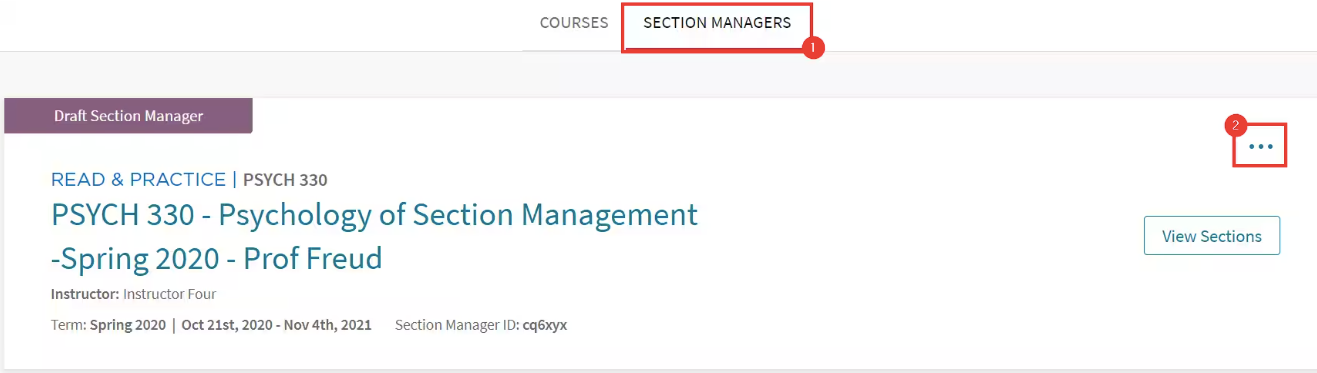
Click Copy Section Managers. After this step, you can choose to make the copy into another Section Manager or a single course.

Delete Section Managers
- If you would like to delete the Section Manager, go to the Section Managers tab of your My Course List and click on the three-dot menu to the right of the Section Manager you want to delete.
- Click Delete Section Manager.
- Selecting Yes, Delete Section Manager will delete the Section Manager but will not delete the individual sections. The sections will then behave like single courses. They cannot be converted into sections under a new Section Manager.