


RapidReturn
This service enables instructors to return large numbers of documents, such as exams and papers, to students quickly and securely.
Visit RapidReturn
SUPPORT CONTACT
Support is provided via the EEE Support Team
RapidReturn Help Documentation
Background
Navigating RapidReturn
Changing an Exam Name
Disassociating and Manually Associating a Student
Creating a Note for Students
Releasing Exams
Unreleasing Files
Rapid Return- Student Instructions
Background
RapidReturn is a service that allows instructors to quickly and securely return in-person exams to students. After you’ve graded the exam, you’ll schedule a time for it to be picked up and scanned. Once scanned, you’ll receive an email letting you know that the exam is ready to be released to your students. See below for instructions on how to do this.
Navigating RapidReturn
- Go to EEE+ RapidReturn. Login if you haven’t already done so.
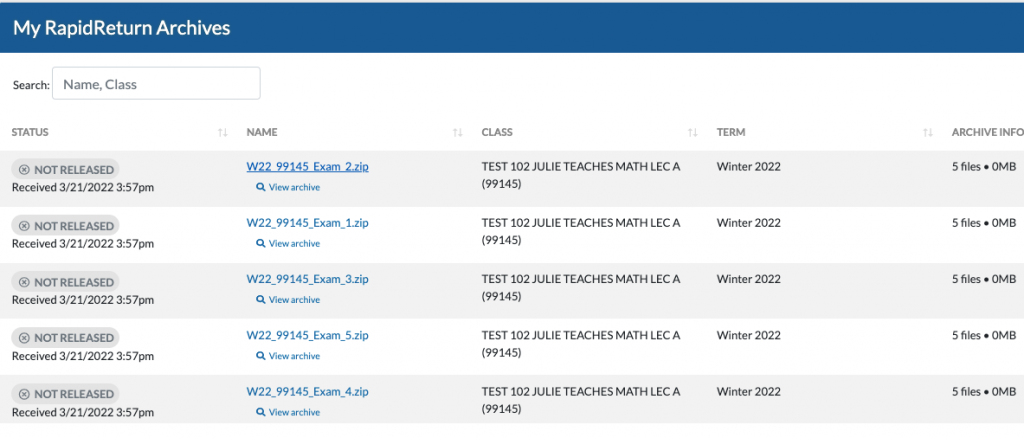
- At the top of the page, click Archive.

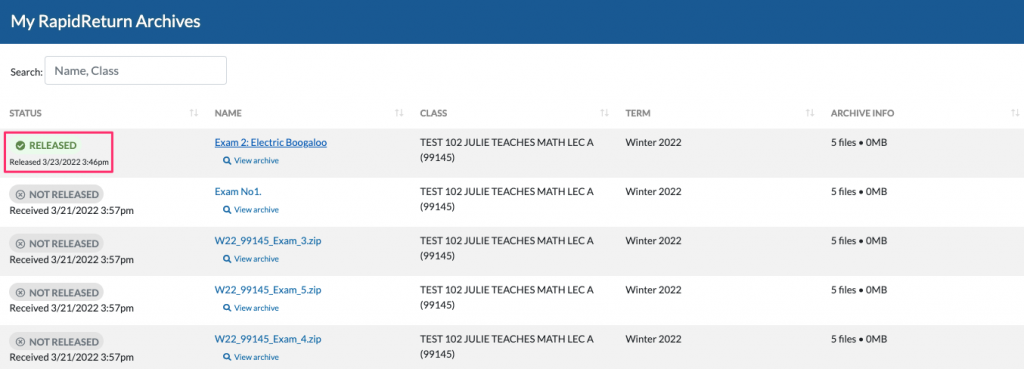
- You will see your archived exams under My RapidReturn Archives. Click which exam you would like to view under the Name column.
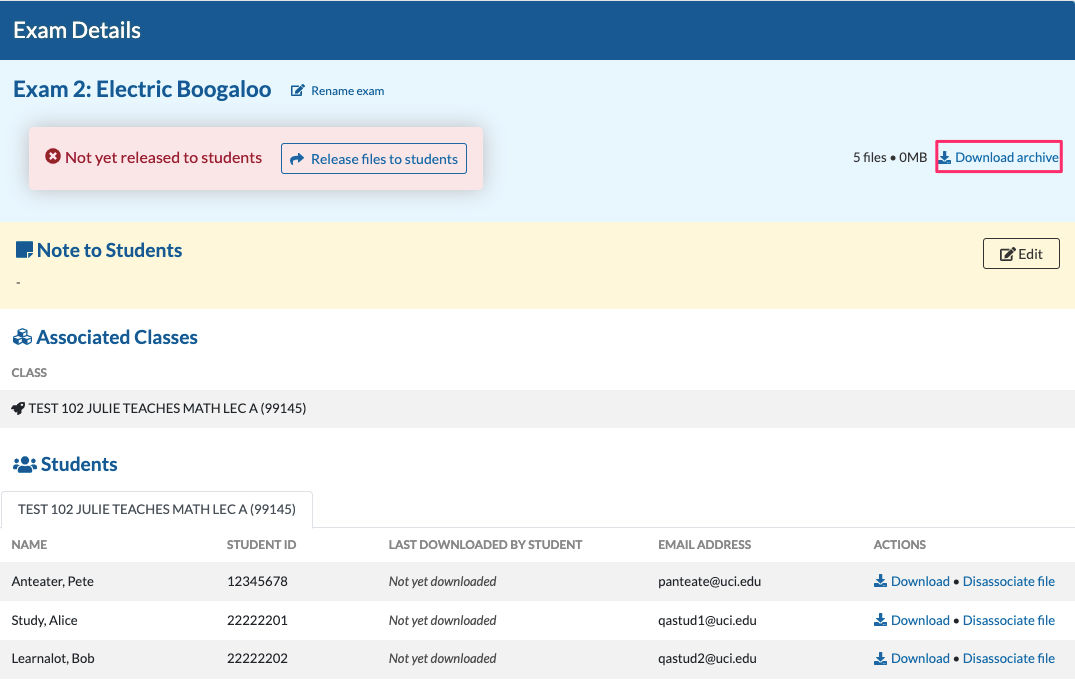
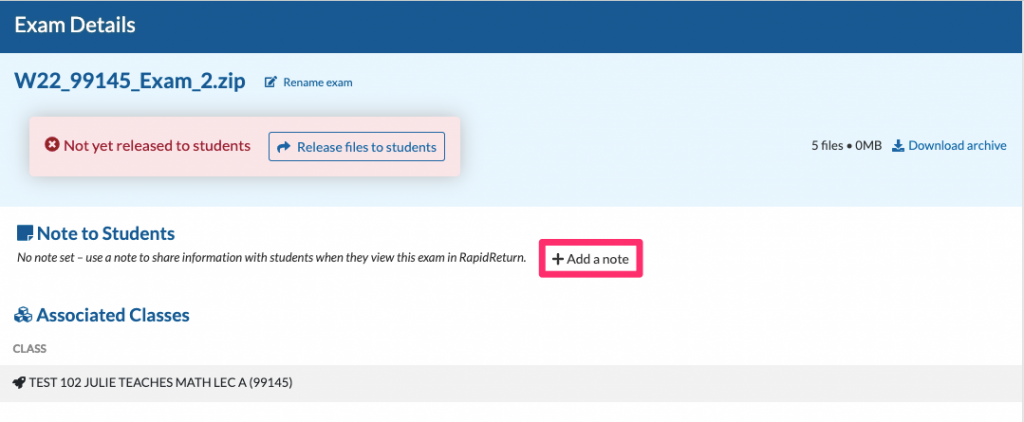
- You will be taken to the Exam Details page.
- To download a copy of the RapidReturn archive, click Download archive. The downloaded archive is a zip file containing student and exam information.
Changing an Exam Name
Changing an exam name will change the exam name that is displayed to students.
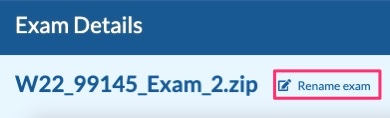
- Under Exam Details, click Rename Exam.
- Type out what you would like to name your exam.
- Press Save Changes.
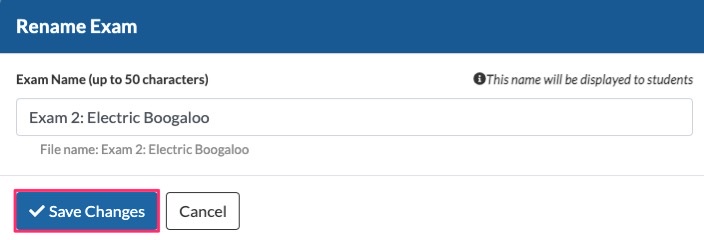
Note: The saved exam name will be displayed to students.
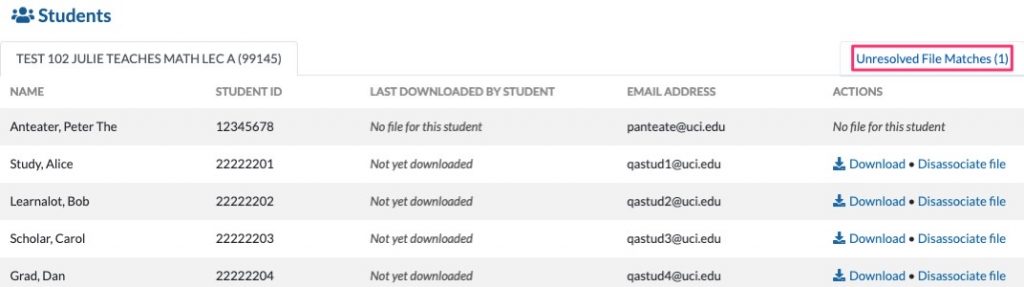
Disassociating and Manually Associating a Student
If you’ve made a mistake when associating files with students, you can disassociate and manually associate their files.
Disassociating a Student
- Under Students, locate the student whose file you want to disassociate.
- Click Disassociate file under the Actions menu next to their name.
- A pop-up will appear and prompt you to click Disassociate file.
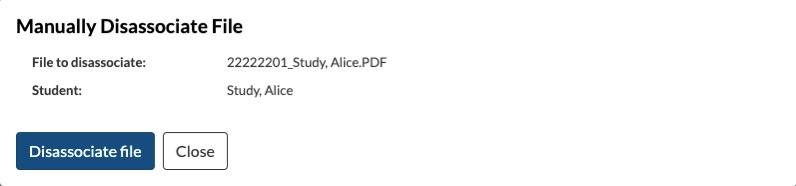
The disassociated student will show up in the Unresolved File Matches tab.
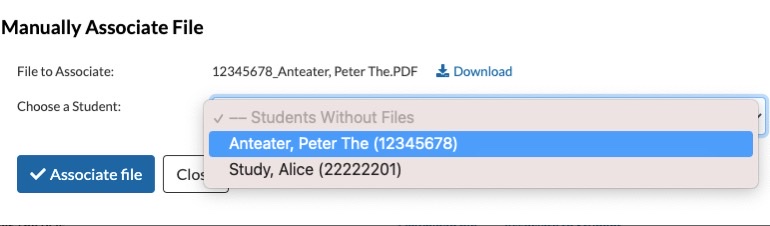
Manually Associating a Student
- To manually associate a student click Unresolved File Matches.
- Locate the file that you want to re-associate.
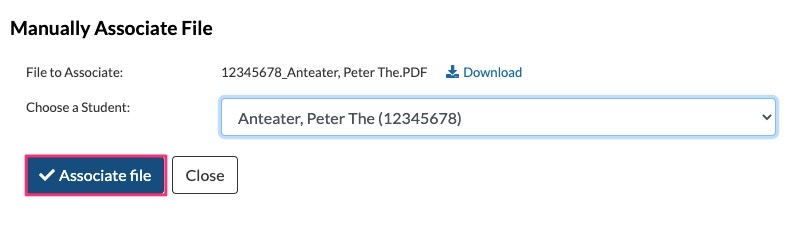
- Click Associate to Student.

- Choose the student you would like to associate the file to in the pop-up menu.
- Click Associate file.
Creating a Note for Students
- Under Note to Students, click +Add a note.
- Write out what you would like to say to your students in the text box.
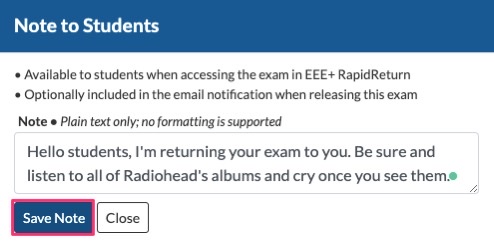
- Click Save Note.
Note: Saved notes can’t be deleted but they can be edited. - Your note will show up in the Note to Students section.

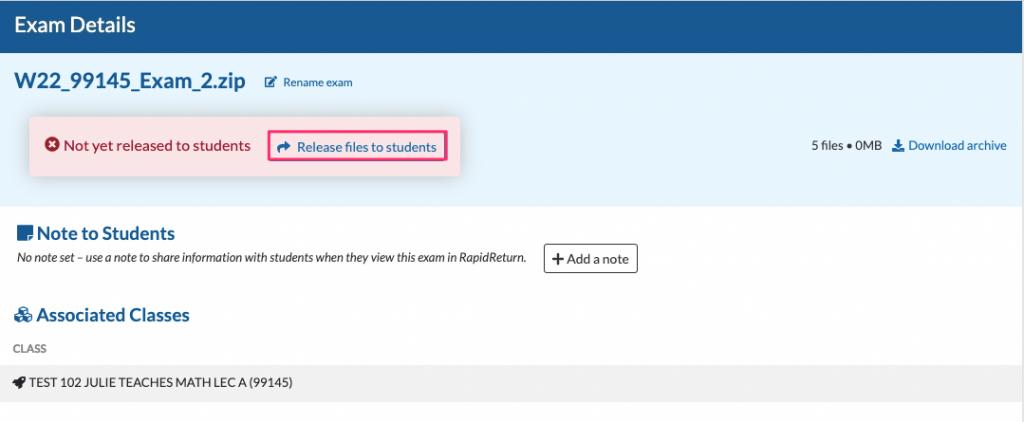
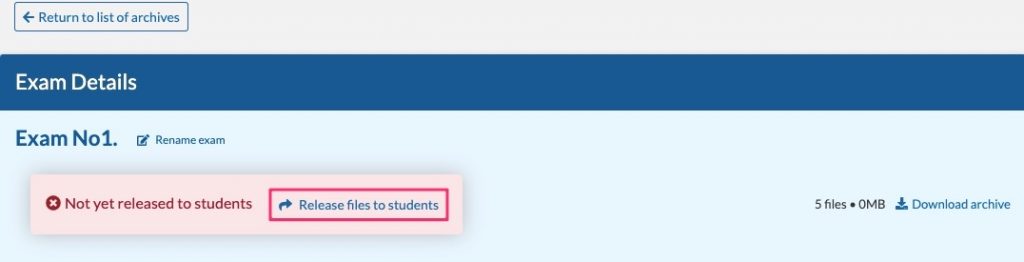
Releasing Exams
- Click Release files to students.
- Name your exam and select whether you want to send an automatic email notification to students with your note or send an email notification manually.
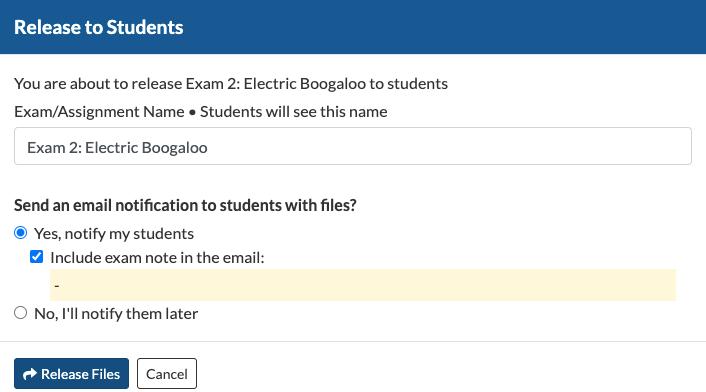
- Click Release Files.
- You will be taken back to exam details and receive a notification that confirms the exam has been released.

Unreleasing Files
If you want to make any changes to your released exam, you can unrelease your files.
- Under My RapidReturn Archives, click a released exam that you want to unreleased.
- Click the Unrelease files button located under Exam Details.

- The previously released green section will appear as Not yet released to students in red.
Note: You may have to refresh your browser for your archives to show up as unreleased.
Rapid Return – STUDENT INSTRUCTIONS
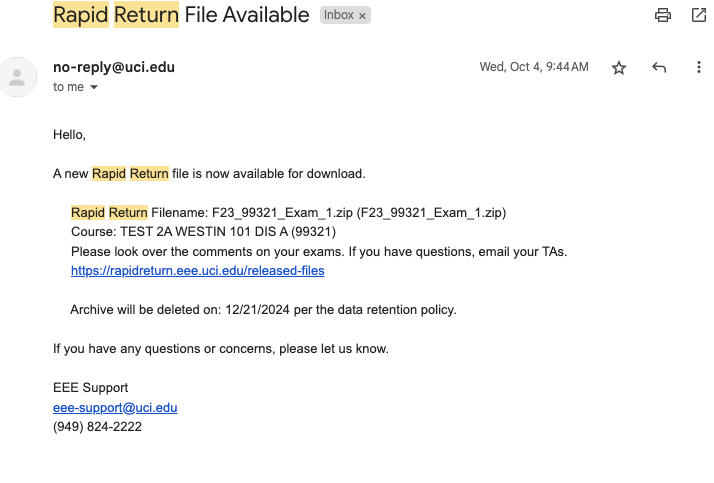
- A message will be sent to your email when a Rapid Return exam has been released. Click the link in the email to see your released file.
- Your exam will appear under Files Returned. Click the Download button to download and see your exam.
Note: Archives of the files are available for one year after the end of the quarter in which the class was taught.