


UCI CANVAS
Canvas is UCI’s learning management system, supported by Instructure. OIT has also created several tools to assist instructors in using the LMS.
Visit Canvas
Faculty Canvas 24 Hour Technical Support
Need time-sensitive or urgent Canvas technical assistance? Contact Instructure’s Canvas support team directly:
Email: support@instructure.com
Live text chat
Student Technical Support
Email: eee-support@uci.edu
UCI Canvas Help Documentation and FAQ
Transferring Final Grades to WebGrades
Importing Grades Into Canvas
Filtering SpeedGrader by Groups
How Do I Give Individual Students Extra Time on a Timed Quiz?
Course Space Visibility
Incomplete Student Access
Canvas Support
Transferring Final Grades to WebGrades
Official final grades are not submitted automatically by Canvas because they must be submitted to the Registrar. You can submit official final scores to the University Registrar by using the WebGrades Transfer Tool, which is available through Grades during the grade transfer window for primary courses in Canvas.
Transferring Final Grades
- Verify your grading scheme for your Canvas course space by going to your course space and clicking Settings.
- Scroll down to Grading Scheme and click the View grading scheme link.
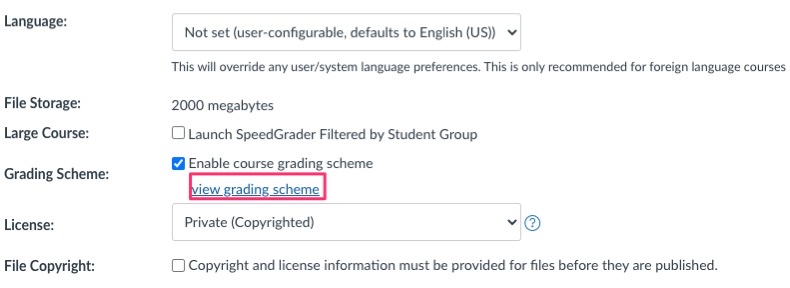
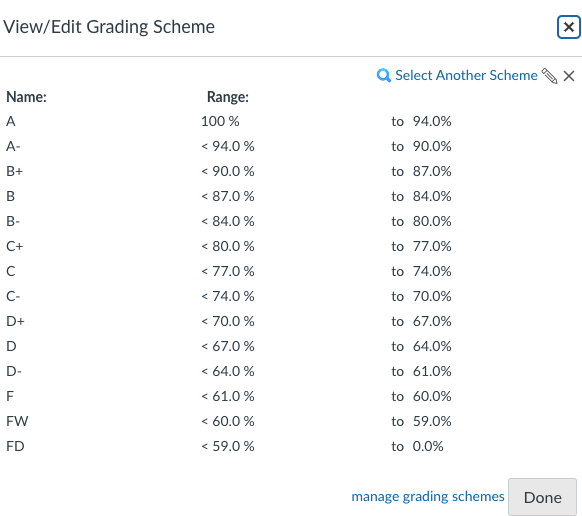
- Check to make sure that the grading scale is correct or select another scheme and click Done.
- Next, open the Grades area in your Canvas course space.
- Review your grades. Press Transfer to WebGrades once you’ve finished.

- You will see a date for when you can transfer your grades.
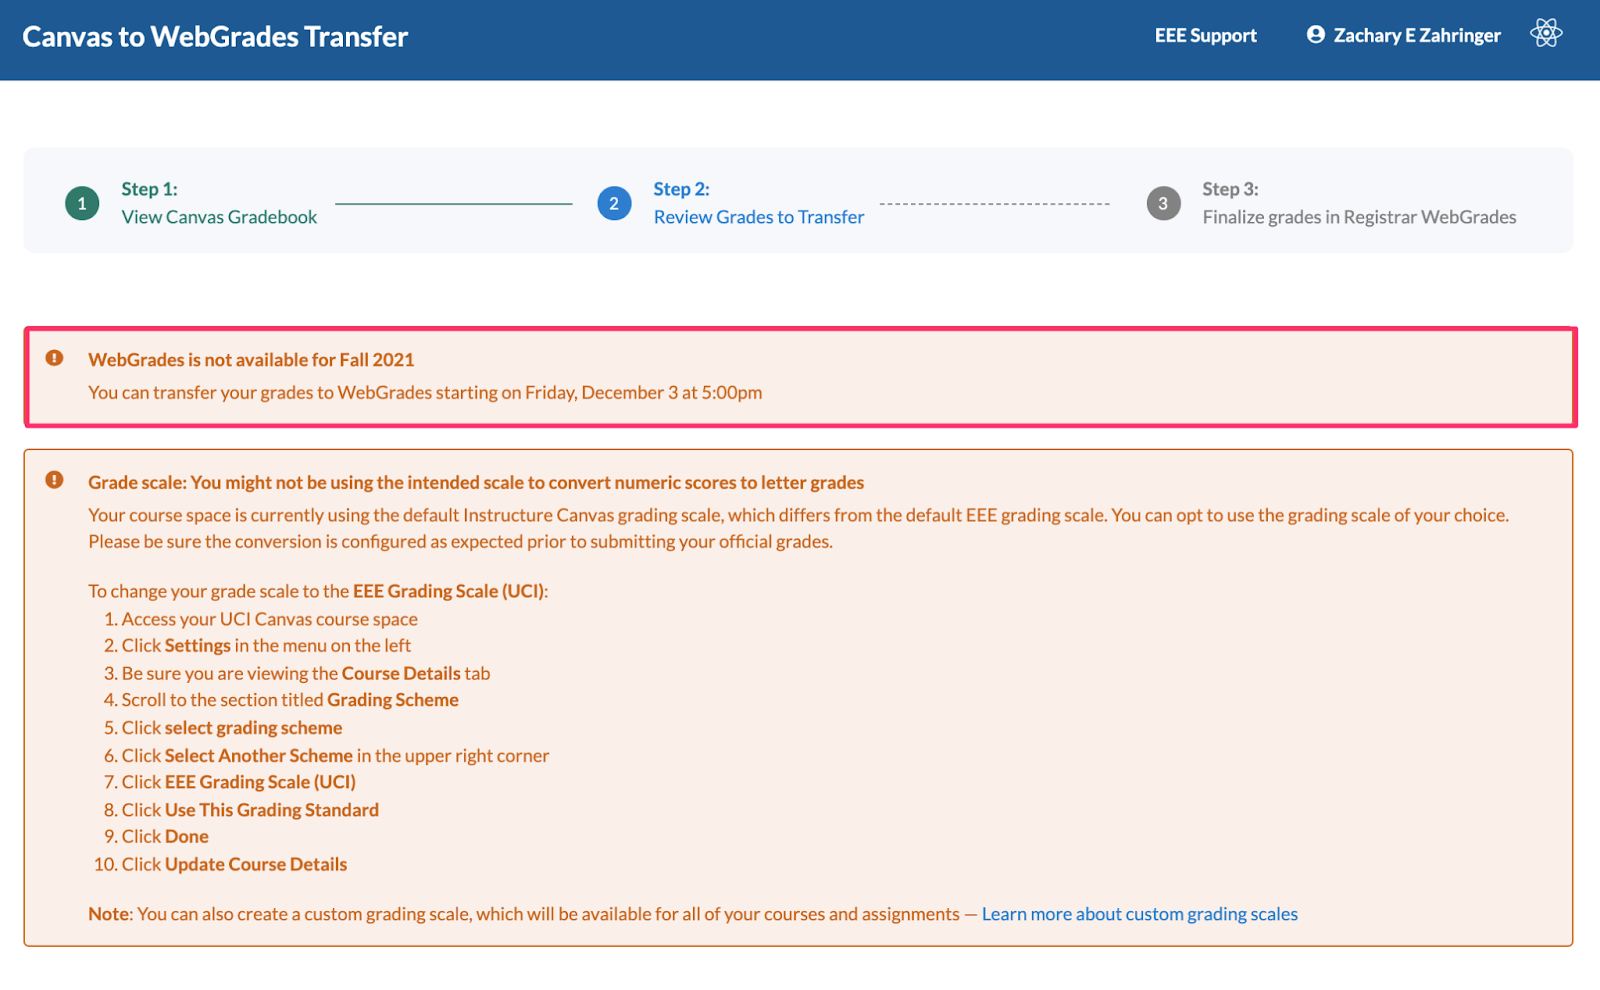
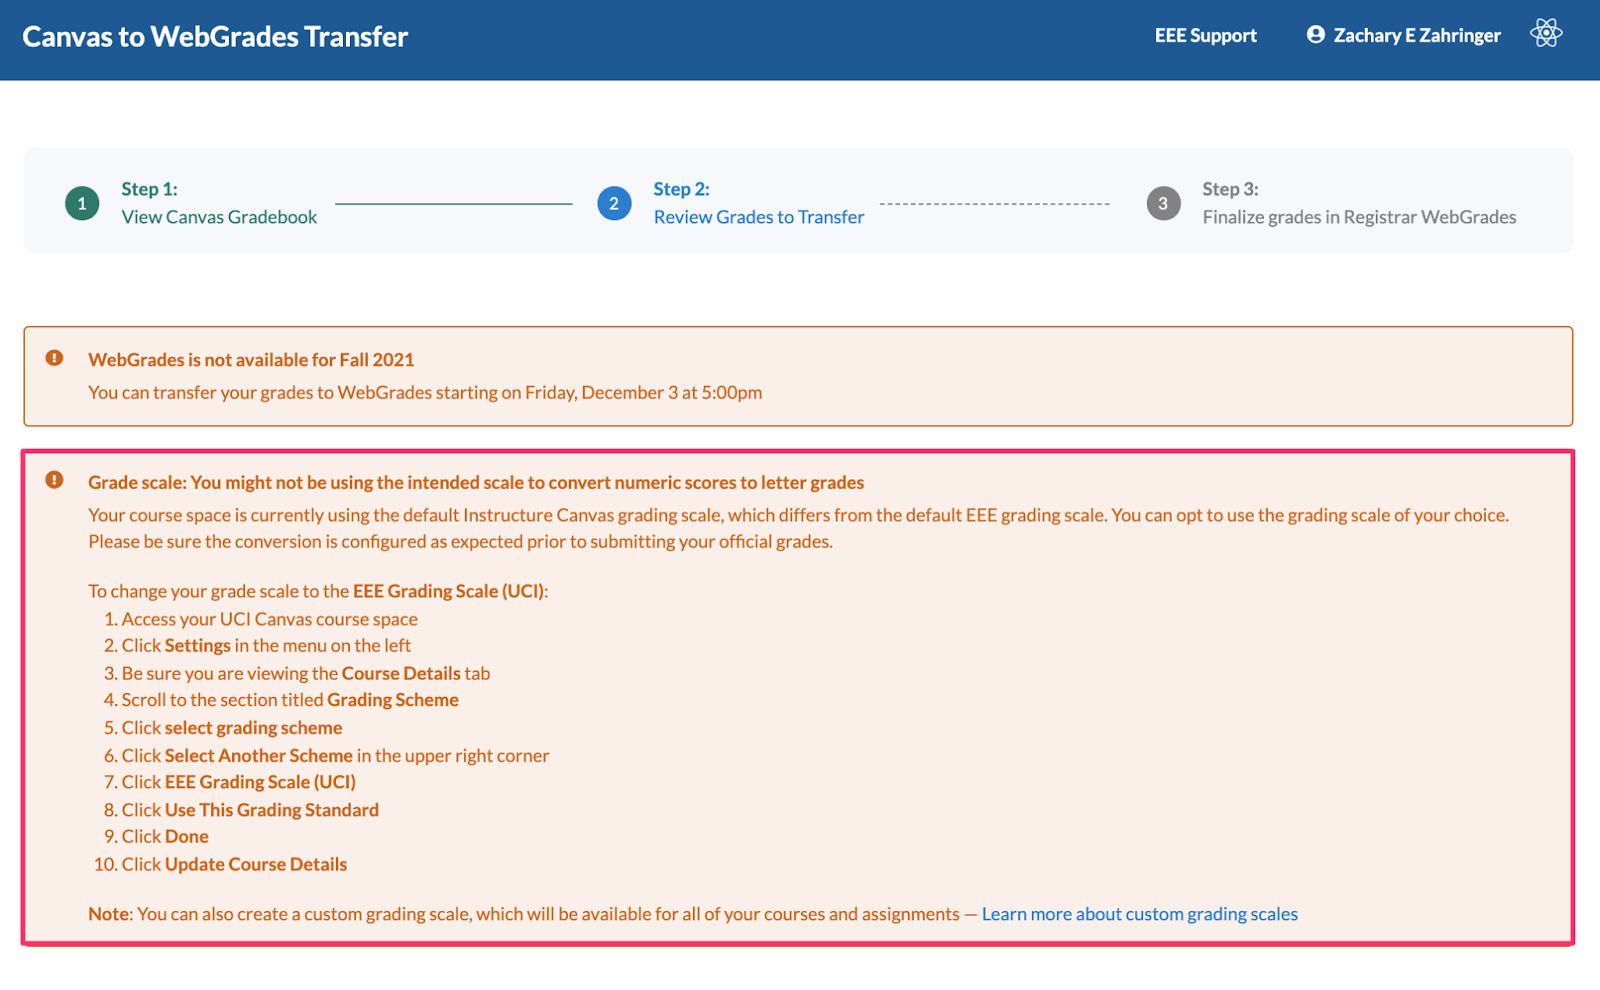
- You will also get another reminder of how you can change your grading scale. The instructions to change your grading skill are above.
- Review and download your grades.
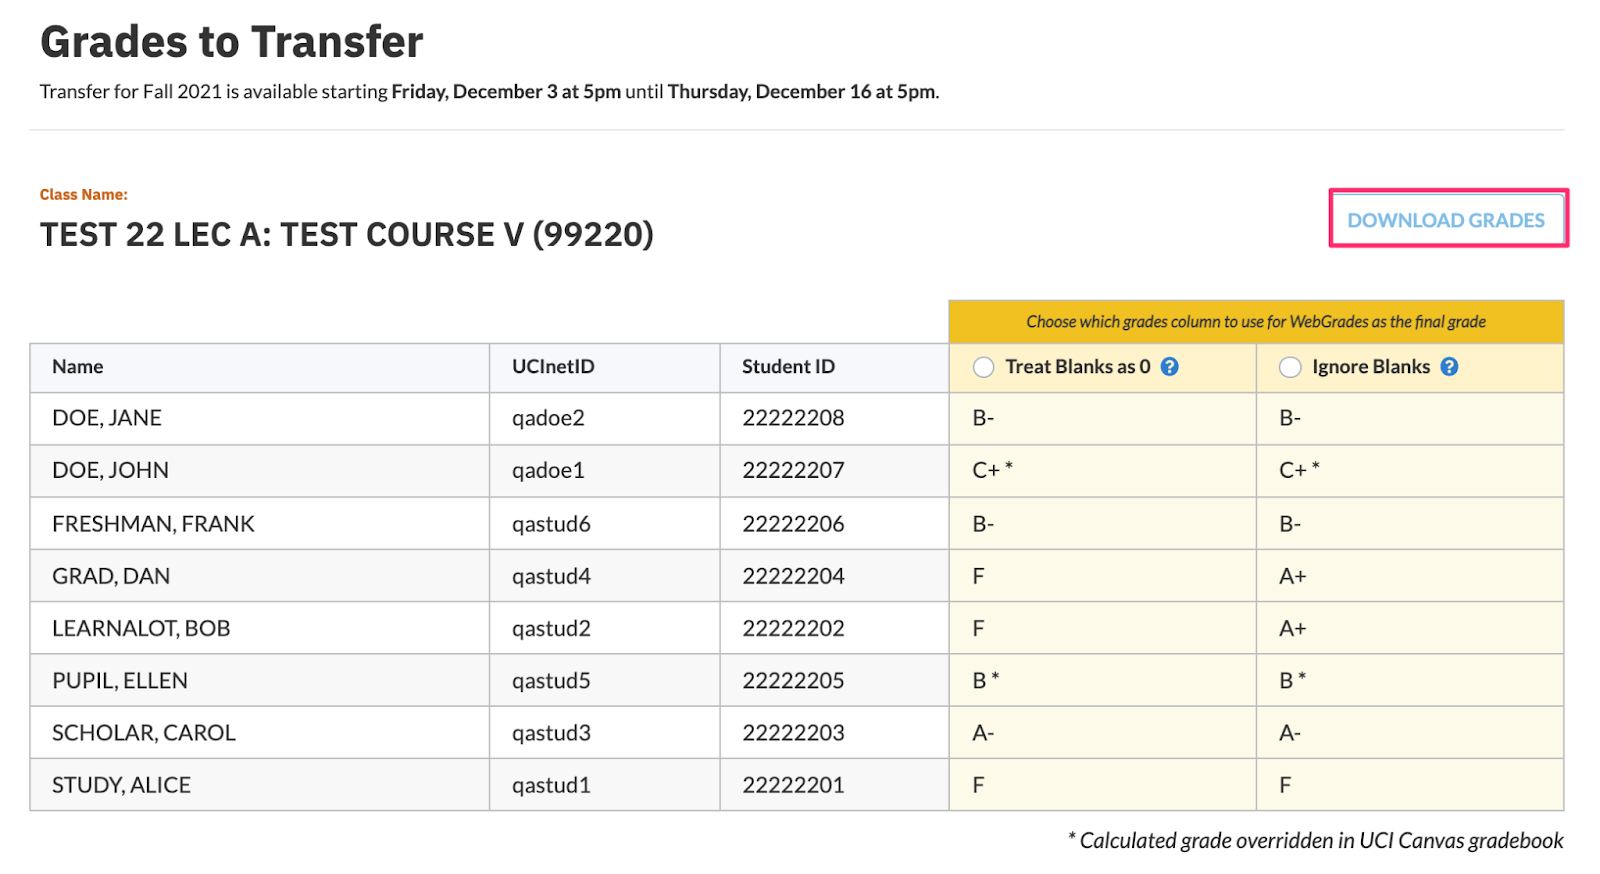
- When transferring grades, choose whether you would like to treat ungraded assignments as zeros or ignore them.
Note: If you have opted to treat ungraded scores as 0, we recommend the blank scores are changed to 0 within the gradebook. This will ensure that students will see the same calculated total score that was submitted to WebGrades.
Continuing Education (formerly Access UCI) Students
Grades for Continuing Education (formerly referred to as Access UCI or Extension) students must be submitted separately to Continuing Education using the following process:
- Go to UCI Continuing Education Grade Entry
- Click on the appropriate course.
- Enter the final grades for the Continuing Education students.
- Press Submit Grades if everything is correct.
For additional help, please contact UCI Continuing Education at (949) 824-5414 or dce-services@uci.edu
Incomplete Grades
According to the UCI Grading Policy an incomplete grade may be assigned when a student’s work is of passing quality but is incomplete for a good cause. The student’s total grade cannot be modified directly within Canvas, but you can modify the letter grade within WebGrades before the final submission.
Importing Grades Into Canvas
You can import scores directly into a Canvas gradebook using a CSV file, but the contents of that file must be in a very specific format. To help facilitate the import of scores, the EEE Team has developed a tool that will help instructors convert existing files into the import format for the Canvas gradebook.
The process takes place in three steps:
- Format scores in a CSV file
- Run the CSV file through the converter
- Import into Canvas Grades
Step 1: Format scores in a CSV file
As a first step, you will need to create a comma-separated value (or CSV) file that includes the following:
- Information about the assignment (i.e. title and points possible).
- Either the UCInetID or the Student ID numbers of the students.
- Student scores.
The formatting should look similar to this: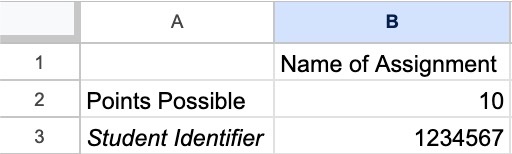
Key for CSV formatting:
Row 1, Column B: Name of the assignment
Row 2, Column A: Points Possible (capital P for both words)
Row 3+, Column A: either Student ID Number or UCInetID. Do not mix and match both ID types in a single CSV.
Row 3+, Column B: The student’s score
If you prefer to work in Excel, please feel free to use this template CSV file as a starting place.
Note: If you utilize Excel, you will need to save it in CSV format before submitting the file for conversion.
Step 2: Run the CSV file through the converter
You can access the file converter tool directly within Grades in Canvas.
- Open the Grades area within your Canvas course space.
- Click the Convert file for the import button.
- Click Browse to identify the CSV created in Step 1.
- Click Next.
Note: If the file includes students who are no longer officially enrolled in the course, you will be prompted to either continue with the process or return to the previous step. If you opt to continue with the process, the students who are not officially enrolled will be omitted from the converted file. - Depending on your browser settings, you may be prompted to open or save the newly generated file.
- You can then return to the Canvas course space or convert an additional file.
- Suppose an assignment title is included in the first row of the original CSV from Step 1, the converted file will include the information needed to create or import the assignments into the Canvas Gradebook. In that case, you can move on to Step 3 to import the assignment scores.
Note: If no assignment title is included in the first row of the original CSV from Step 1, the converted file will include a sample assignment. The Sample Assignment title will appear in the first row — you can replace that with the actual name of the assignment. The second row will contain 0 — you can replace that with the actual points possible. Finally, you can enter the score for each student in the right-most position of the line that begins with their name.
Step 3: Import into Canvas Grades
This updated file can then be imported directly into the Canvas gradebook.
Canvas Guides provided by Instructure
How do I upload changes to the Gradebook?
Filtering SpeedGrader by Groups
Managing student submissions in SpeedGrader for a large, single section Canvas course spaces can be difficult. One workaround is to take advantage of a Canvas feature that allows you filter the SpeedGrader by Groups. To do this, start by setting up a Group Set comprised of a number of smaller groups (much like sections) and assigning your students to them. How many groups is up to you, but often these groups reflect the number of TAs a course has.
For more information on how to create Groups, please see this helpful guide.
Once you have a Group Set full of populated groups, you are now ready to enable the Launch SpeedGrader Filtered by Student Group setting.
- Navigate to the course’s Settings area.
- Make sure you’re on the Course Details tab.
- Scroll down to Large Course section about midway down the list of settings.
- Check the box next to Launch SpeedGrader Filtered by Student Group.
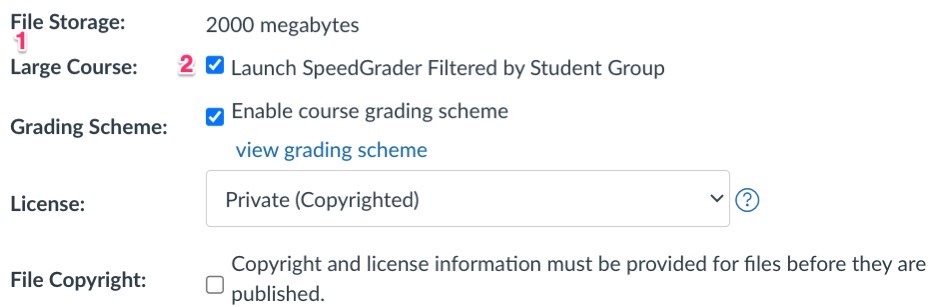
- Scroll to the bottom of the page and click the blue Update Course Details button.

- SpeedGrader will launch filtered to groups from this point on for all Instructors and TAs.
Limitations and Workarounds
While this is a very useful feature for grading submissions in large courses, it does come with limitations. After enabling this feature, it may be more difficult to quickly find a single student’s assignment submission in SpeedGrader without knowing which group they reside in. However, there are a couple of workarounds.
Method 1: View Student Grades
This method allows you to find an individual student in the Gradebook, then view their Grades page. From there you can launch into SpeedGrader for any of their assignments. Doing so should take you directly to their submission in SpeedGrader, provided they have one.
- Navigate to the Grades area of the course space.
- Locate the student in the first column.
- Click on their name to open the Grades Detail Tray.
- In the Grades Details Tray, click on Grades.
- Find the assignment you wish to view, and click its name.
- Finally click View Feedback for their submission.
Method 2: Gradebook Individual View
This method allows you to find a individual student, and choose an specific assignment to view in SpeedGrader.
- Navigate to the Grades area of the course space.
- In the Gradebook dropdown menu, choose Individual Gradebook
- Scroll down to the Content Selection section.
- Locate the stuent in the Select a Student dropdown.
- Choose the assignment in the Select an Assignment dropdown.
- Next, scroll down to the Grading section.
- Click on Submission Details.
- Finally, click on More details in SpeedGrader to launch into SpeedGrader for that student.
How Do I Give Individual Students Extra Time on a Timed Quiz?
If a student is eligible for alternative testing accommodations per the Disability Services Center, it is the instructor’s responsibility to provide that extra time for any exams or quizzes in Canvas. You can set up your exam in Canvas so that this student, and only this student, have extra time or extra attempts to retake a given exam.
Some instructors set narrow Available From and Available Until times for quizzes, typically to enforce the time at which students begin the quiz. For example, a quiz with a two-hour standard time limit may only be available from 8 AM to 10 AM. This causes all in-progress quiz submissions to auto-submit at 10 AM, regardless of quiz time extensions. If this case applies to your quiz, you will need to take both actions outlined below.
Step 1: Extending the Quiz Time Limit
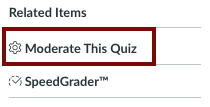
- Click on the name of the quiz on the Quizzes page in your Canvas course space.
- Towards the right side of the page, click on the Moderate This Quiz link.
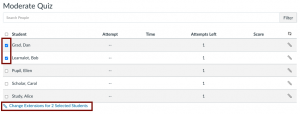
- Click on the checkboxes next to each student you wish to give extra time to.
- Click on the Change Extensions for [#] Selected Students link near the bottom of the page.
- Enter the amount of time in the Extra Time on Every Attempt field and click Save. Extra time can only be added in full-minute increments.
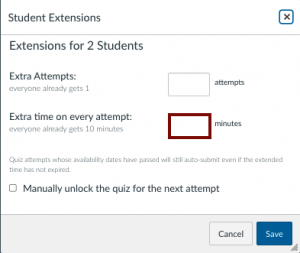
Note: Quiz availability dates still apply when moderating a quiz. If the Until date passes when students are taking the quiz with extended time, the quiz auto-submits even if the student’s time extension has not expired.
Step 2: Adjusting Availability and Due Dates on Quizzes
If your quiz has an availability window that matches the time limit, you must do this step, or extending the quiz time limit alone will have no effect.
- Click on the Edit button for the quiz you would like to modify.
- Scroll down to the section titled Assign. The Assign to field has a default value of Everyone.
- Click on the +Add button.
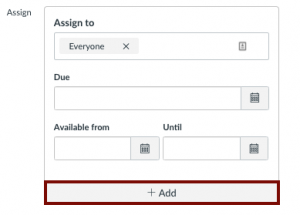
- From the drop-down, select the student(s) who were given extended time or manually type their name.
- Set the extended availability and due dates for the student(s).
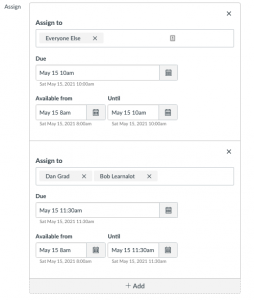
Note: Ensure that the window of availability is at least as long as the longest extended quiz time needed for any of the students with accommodations. For example, if you set the time limit for the quiz to be 1 hour, but you have a student with accommodation of double-time, you will need to ensure that your Available From – Until time window is at least two hours long.
Course Space Visibility
The following guide covers the default course space visibility settings in UCI Canvas, and if needed, steps on adjusting a course’s visibility.
Default course visibility settings in UCI Canvas
As of Winter Quarter 2021, newly created Canvas course spaces will have their Syllabus page visibility set to Institution by default.
If left unchanged this will:
- Allow access to your course space Syllabus page, but only if you share a direct link to it.
- Sharing this link will only be viewable to users with UCI Canvas access, so it will exclude Applicants and the general public.
- Not allow access to the rest of your course space such as Files, Assignments, or Discussions. These areas are limited to officially enrolled students, and/or Additional Students whom you’ve granted access.
Changing the visibility settings in your course space
If you are unhappy with the default course visibility settings outlined above, you can opt to change them at any time by following instructure’s step-by-step guide: How do I customize visibility options for a course?
For example: Unchecking the Customize checkbox for Syllabus will result in only officially enrolled students being able to access your course space in its entirety.
Linking to your course space on WebSOC
If you would like to provide a link to your entire Canvas course space in the Registrar’s WebSOC tool, you will need to expand your course space’s visibility to either Institution or Public and make sure the course space is Published.
Please note: Making this change will greatly expand the visibility of your course space from just the Syllabus page to including most areas of your course space. The only exceptions would be where FERPA protections would be violated, areas where actual student interaction would begin (such as taking Quizzes), and areas you have hidden from all students in the course navigation. For more details, please see Instructure’s PDF on course visibility.
If you’re interested, please take a look at the step-by-step guide: How do I customize visibility options for a course?
Incomplete Student Access
If a student contacts you about an incomplete grade from a prior term and you need to allow them participation access to their previous Canvas course space, you can complete the following steps to reopen the course for access. The following guide is based on Janet DiVincenzo’s fantastic Canvas Start/End Dates: What Instructors Need to Know.
Please note: Making this change will open the course for all students who were enrolled. This will also place the course on the all enrolled student’s Canvas Dashboard. Because of this, you may get inquiries from students. Our recommendation is to allow access for only the amount of time that is needed for the incomplete, then close the course to minimize confusion. If you have concerns, there is an alternative method presented below.
Allowing Access to an Older Canvas Course to a Student with an Incomplete
- To Set the Participation to Course open Canvas and click Settings.
- Scroll down to Participation and select Course.
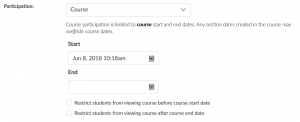
- Specify an End Date of your choosing.
Note: Extending the End date will “re-open” the course for all students. All students may see this course reappear on their Canvas dashboard, however, this will disappear after the End Date has passed. - Assign the Incomplete student a different availability/due date for the missing assignments. To do this, click the “+Add” button in the edit area of the assignment. Here’s a help article you can refer to about that process.
Note: As mentioned above, by default students can still view your course in a read-only state after the end of a term.
The above two “Restrict” options will govern students’ access to Canvas and override the default options. If you do not want students to access your course after the term ends, then you’ll need to check the option “Restrict students from viewing course after course end date.”
Alternate Approach: Add the Incomplete Student to a Newer Version of Your Class
Assuming the same course is offered again with the same assignments, you could add the Incomplete Student to your current Canvas course instead.
- If the Incomplete student needs to make up so many assignments that you want them to have an accurate accounting of their new grade, you will need to manually update the gradebook with the grades they previously earned.
- However, when you go to WebGrades to submit grades for the entire class at the end of the course, the Incomplete student will not be on the Registrar’s List.
- Hence, to submit grades for the Incomplete student, you will follow the standard WebGrades procedure for requesting a grade change for this student.
Canvas Support
Below are three different options for getting assistance with Canvas.
Canvas 24 Hour Technical Support
Need time-sensitive or urgent Canvas technical assistance? Contact Instructure’s Canvas support team directly:
EEE Support
Need assistance with UCI’s EEE/EEE+ tools (GrandCentral, Evaluations, Scout, etc …)?
Fill out our EEE Support contact form now!
Online (Zoom) Canvas 1-on-1 Canvas Sessions
Need non-urgent technical assistance with your Canvas course space? The EEE Support team hosts Zoom 1-on-1 sessions to assist instructors and TAs with Canvas.
After scheduling your session, you will be sent an email containing your scheduled meeting time, and a link for the Zoom meeting. You will also receive a reminder email 2 hours before the scheduled meeting time.
If you have any questions about how to connect to a Zoom meeting, please see the following help guide or contact EEE Support (eee-support@uci.edu)
Example topics we can cover in your session:
- Creating quizzes
- Creating and managing group assignments
- Setting up your Canvas gradebook and weighting grades
- …or any other Canvas question!
Sign up for a Zoom appointment today!