Website
Visit Zoom
SUPPORT CONTACT
Support is provided via the dedicated OIT Zoom website and the OIT Help Desk
Help Documentation
Information about Zoom bombing & how to secure your lecture
Facilitating Zoom lectures (by the School of Business)
Vendor Information
Zoom
Getting Started with Zoom in UCI Canvas
Getting Started with Zoom Outside of UCI Canvas
Using Zoom LTI in Canvas
Scheduling a New Zoom Meeting
Importing an Existing Zoom Meeting into Your Canvas Course
Considerations When Importing
Enable Transcripts on Zoom
Enable Captioning on Zoom
Polling Students within Zoom
Using Breakout Rooms
Facilitating Large Classes in Zoom
Tips & Techniques
Training Webinars
Zoom
Zoom is a remote meeting tool used for everything from synchronous and asynchronous lectures to group discussions and office hours. Zoom allows you to make use of breakout rooms, polling, virtual whiteboards, and more.
Getting Started with Zoom in UCI Canvas
Before you can start scheduling sessions, you will need to add the Zoom integration to your Canvas course space navigation menu.
- Inside your Canvas course space, click on “Settings” in the course navigation menu.
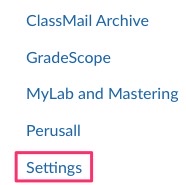
- Click on the “Navigation Tab”.

- Scroll until you see the “Zoom” navigation item.
- Click on the “three dots” menu to the right of “Zoom” and choose “+Enable”.
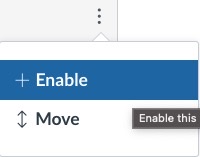
- Scroll to the bottom of the page and click the blue “Save” button to confirm your changes.

IMPORTANT: Information about securing your lectures from “Zoom bombing”.
Getting Started with Zoom outside of UCI Canvas
Getting started by signing in, joining a Zoom session, creating a Zoom session, or scheduling a Zoom session, provided by Zoom
- Select the “Sign in with SSO” option when prompted by the Zoom client.
Back to Top
Using Zoom LTI in UCI Canvas
The Zoom Pro LTI will allow instructors to schedule & manage meetings, see upcoming and previously scheduled meetings, and view any Cloud Recordings that you have created.
For the students, it will allow them to see upcoming and previously scheduled meetings, and view any Cloud Recordings that you have made available to them if you use the Canvas Zoom integration to schedule those meetings.
The two sections below cover creating a brand new meeting using the Canvas Zoom integration, as well as importing an existing Zoom meeting (that was scheduled outside of Zoom) into your Canvas course.
Scheduling a New Zoom Meeting
- Click on “Zoom” in your course Navigation Menu.
*If you have not already connected to your Zoom account, you will receive a message to sign into UCI Zoom. Do so, then come back to Canvas. - Next, click on the blue “Schedule a New Meeting” button in the upper right.

- Set a topic and description for your session.
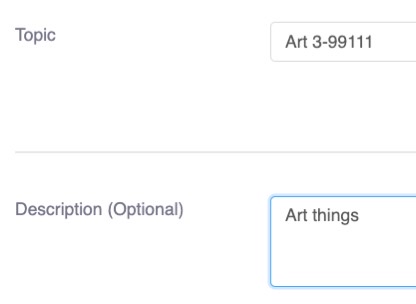
- Set the date, time, and duration of your meeting.

- If you are meeting every week at the same time, you can make it a recurring meeting.
- Consider setting a password for the meeting as well. This will help secure your Zoom session. Passwords are automatically included in the meeting URL when launching the meeting from Canvas, but can also be shared by sharing the meeting URL from the meeting details.

- If you want to have your session automatically recorded, set the Meeting Option for “Record the meeting automatically” and choose the “In the cloud” option. This will make the recording available to your students in the “Cloud Recording” tab.

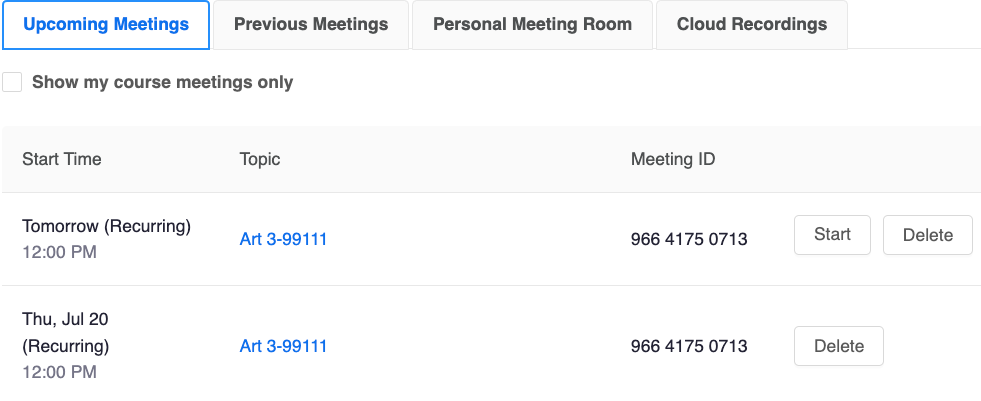
- The Zoom session will show up under the “Upcoming Meetings” tab inside your Canvas course space.
Importing an existing Zoom meeting into your Canvas course
*Use this option if you have scheduled your Zoom sessions on the uci.zoom.us website, or through the desktop app)
- Click on “Zoom” in your course Navigation Menu.
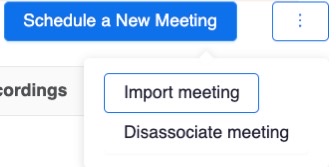
(If you have not connected your Zoom account, you will receive a message to sign into UCI Zoom. Do so, then come back to Canvas.) - Next, click on the “three dots” menu button next to the blue “Schedule a New Meeting” button in the upper right.
- Choose “Import Meeting”.
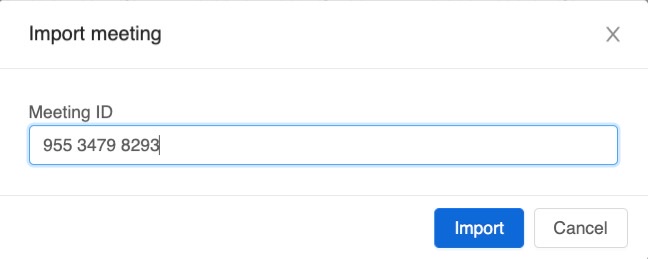
- Copy/paste the meeting ID that you want to import.
- The session should now be listed under upcoming meetings. If the meeting was a recurring meeting, all future instances of that meeting should show up as well.

Considerations When Importing
- When OIT Classroom Technologies schedules webinars on behalf of instructors with large classes, we’ve learned that those instructors cannot import the webinar IDs through the Canvas integration. Instead, we’re recommending they add calendar events or post the webinar links within their Canvas content.
- Meetings that are imported will not have their Cloud Recordings automatically available to students. You will receive an email notification after your Cloud Recording processes with a share link. You can email that to your students, or share it as a URL in Canvas if you would like them to access that recording.
Enable transcripts on Zoom
Learn about enabling live and after-the-fact transcripts on the UCI Zoom Help Center →
Enable captioning on Zoom
Learn about captioning on the UCI Zoom Help Center →
Polling students within Zoom
Learn about Zoom polls on the UCI Zoom Help Center →
Using breakout rooms
Learn more about Zoom breakout rooms on the UCI Zoom Help Center →
Facilitating Large Classes in Zoom
Instructors teaching Registrar-listed courses with 300+ students will receive assistance from OIT Classroom Technologies to ensure that their courses are supported in Zoom. Learn more about Zoom for large classes on the UCI Zoom Help Center →
Note: When OIT Classroom Technologies schedules webinars on behalf of instructors with large classes, we’ve learned that those instructors cannot import the webinar IDs through the Canvas integration. Instead, we’re recommending they add calendar events or post the webinar links within their Canvas content.
Tips for holding your course live:
- Run a practice session first!
- The maximum capacity of a Zoom meeting is 300.
- If you are concerned about bandwidth, consider having your TAs run separate Zoom meetings for groups of your students (for example, one TA holds a Zoom meeting for ~30 students). You can create a Doodle poll for your students to help with scheduling. After creating the poll, you can limit the number of votes per option, to keep the Zoom sessions balanced.
- Take advantage of breakout rooms and have your TAs help manage the rooms (see “Small discussions using breakout rooms” below)
- Take advantage of the chat room to have students ask questions or discuss topics.
Or, record videos and have your students watch them later:
- Take advantage of Zoom’s screen share recording (be sure to push the “Record” button first!)
- You can record your screen, a PowerPoint presentation, or yourself using the digital whiteboard.
- After you finish recording your session, click “End Meeting”, and you will be prompted to convert and save the video onto your computer.
- Once you have the video on your computer, upload your video to YuJa video and post the link to the video on Canvas. You can use whatever captioning software (Zoom’s 3rd party integrations, YuJa, YouTube, etc.) you like to make your video accessible.
- Take advantage of the discussion board on Canvas to have students discuss topics, ask questions, or answer other students questions. You and/or your TAs can monitor the threads.
If you have a large meeting or event with 300+ attendees that is not a Registrar-listed class, please see Zoom Help Center: High capacity meeting/webinar upgrades.
Tips & Techniques
- If you aren’t using the UCI Canvas Integration: Each Zoom session will have a Personal Meeting ID associated with it that you can share the ID with your students to have them join your Zoom session.
- Go to the settings to mute participants on entry to reduce background noise.
- You can record sessions by pressing the “Record” button, or by setting up ahead of time in Advanced Options while scheduling a Zoom session.
- If you are not using the Zoom integration in Canvas, you can upload your video as unlisted to YouTube (which you can then link to on Canvas)
- Inside your Zoom session, you can share your screen (including PowerPoint presentations), or share a whiteboard where you can draw out content.
- If sharing the whiteboard, you can toggle back and forth between the whiteboard and other screens without losing what you drew.
Back to Top

